

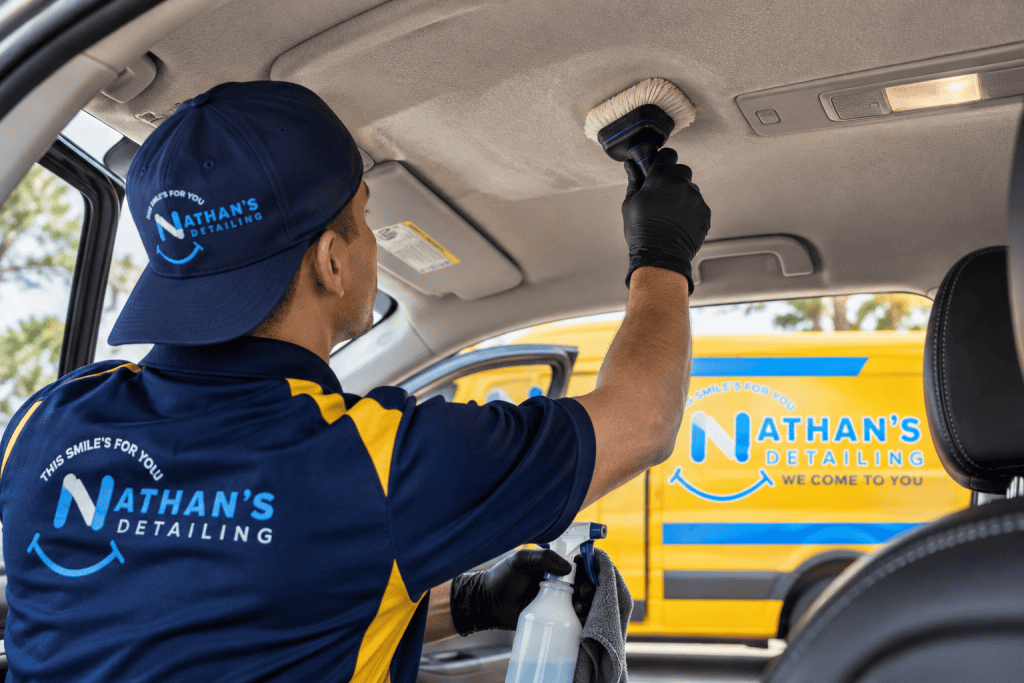

During mobile car detailing, a car headliner is normally cleaned by removing loose dust first, inspecting the fabric and existing damage, testing a compatible cleaner, using controlled spot treatment with minimal moisture, applying gentle agitation, transferring loosened soil into a clean towel, and allowing the area to dry. Aggressive extraction is generally avoided because excess liquid and mechanical stress can affect the bonded layers behind the visible fabric, especially when the headliner is already aged or compromised.
Why does a car headliner require a different cleaning method?
A vehicle ceiling may appear to be a single piece of fabric, but “headliner” describes an interior component rather than only its visible textile. Automotive-engineering literature describes headliners as composite structures in which decorative or foam-backed fabric can be bonded to a molded substrate with an adhesive system.[1]
That construction creates a different cleaning problem from carpet. On compatible carpet, a detailer may have enough material thickness, access and recovery capacity to introduce solution and extract it. With a headliner, the visible fabric can be only one layer of a thin laminated assembly positioned directly against bonded materials.
The practical objective is therefore not maximum wet cleaning. It is maximum safe soil removal within the moisture, friction and material limits of the headliner.
This is why headliners receive their own process within car interior material cleaning and why professional mobile car detailing may use several cleaning methods inside the same vehicle.
Face material
The visible textile determines how much friction, chemistry and moisture can be applied without changing color or texture.
Bonded structure
Foam, adhesive and substrate can sit behind the visible material, so treatment decisions must account for layers that cannot be seen from the cabin.
Existing condition
Age, heat exposure, previous moisture, deteriorated foam and existing sagging can reduce the amount of additional cleaning stress the assembly can tolerate.
What does engineering evidence tell us about headliner construction?
The reason moisture control matters becomes clearer when the headliner is considered as an engineered composite rather than decorative fabric.
| Evidence | Measured or documented fact | Why it matters during cleaning |
|---|---|---|
| SAE headliner research | Automotive headliners have been manufactured by bonding polyurethane-foam-backed fabric to molded headliner shells using adhesive systems.[1] | The visible textile can be mechanically connected to hidden bonded layers. |
| Published headliner construction example | One experimental conventional PU-composite headliner used a 4 mm soft polyurethane foam layer with an area density of 104 g/m² and material density of 26 kg/m³.[2] | It illustrates how thin the functional layers behind the visible surface can be. These numbers are an example—not a universal headliner specification. |
| FMVSS No. 302 | Headlining is specifically listed among vehicle interior components covered by the U.S. flammability standard. Material within 13 mm of the occupant compartment air space is subject to its requirements.[3] | The headliner is a regulated vehicle-interior component, not merely cosmetic fabric. |
| OEM care guidance | Ford instructs owners to remove loose dirt, use a soft damp cloth, spot-clean heavy stains and avoid oversaturating the material.[4] | The manufacturer’s process itself prioritizes low moisture and controlled treatment. |
| OEM surface-specific guidance | Volvo distinguishes headliner cleaning from extraction-machine cleaning of upholstery and warns that careless or harsh headliner cleaning can cause damage.[5] | A machine suitable for seats is not automatically suitable for the roof liner. |
The evidence does not establish one universal amount of water, brush pressure or chemical concentration that is safe for every headliner. Those limits depend on the actual vehicle and condition.
Inspection determines whether the headliner should be cleaned aggressively at all
Before moisture is introduced, the headliner should be inspected under good lighting. The objective is to distinguish removable contamination from structural or material failure.
- Sagging or hanging fabric
- Loose material around edges or openings
- Bubbles or local delamination
- Wrinkles or stretched textile
- Old water marks
- Powdery or deteriorated foam
- Previous adhesive repair
- Discoloration from previous chemicals
- Marks near sunroof, windshield or roof penetrations
A stain near a sunroof or windshield can represent water intrusion rather than ordinary interior soil. Cleaning the visible mark without correcting an active leak treats the symptom rather than the cause.
Existing sagging changes the cleaning objective
A sagging headliner is no longer only a cleaning problem. It can indicate deterioration or separation somewhere within the laminated assembly.
Cleaning cannot recreate the original manufactured bond between deteriorated materials. If the fabric is already separating, stronger wetting, pulling, brushing or suction may place additional stress on an unstable area.
What is the correct headliner-cleaning sequence?
The process moves from the least invasive operation to the more active operation. That sequence matters because every successful early step reduces the amount of chemistry, agitation and moisture required later.
| Stage | Primary objective | Control variable | Failure mode being avoided |
|---|---|---|---|
| 1. Inspect | Identify soil, stains, water marks and pre-existing failure. | Condition assessment | Treating structural damage as removable contamination. |
| 2. Remove dry soil | Lift dust and loose particles before liquid is introduced. | Suction and brush pressure | Turning loose dust into damp residue or abrasion. |
| 3. Test | Check cleaner and towel interaction in a discreet location. | Chemistry and color stability | Visible discoloration, texture change or dye transfer. |
| 4. Spot treat | Place compatible chemistry only where needed. | Liquid volume | Blanket saturation. |
| 5. Agitate gently | Loosen bonded contamination. | Friction | Pilling, fuzzing or stretching. |
| 6. Transfer soil | Move loosened contamination into a clean towel. | Towel cleanliness and pressure | Redistributing dissolved soil. |
| 7. Dry and verify | Confirm texture, color, moisture level and structural condition. | Airflow and inspection | Residual moisture or unnoticed material change. |
How do headliner-cleaning methods compare?
Different tools introduce different combinations of moisture, friction, suction and heat. The table below is a Nathan’s Detailing relative decision matrix. Scores are comparative process ratings from 1 to 5—not laboratory measurements or manufacturer specifications.
| Method | Relative moisture load 1–5 | Mechanical load 1–5 | Heat load 1–5 | Immediate liquid recovery | Headliner role |
|---|---|---|---|---|---|
| Dry dusting / soft brushing | 1 | 1–2 | 1 | Not required | First-line method for loose contamination. |
| Controlled vacuuming | 1 | 2 | 1 | Dry suction | Useful when suction and contact remain gentle. |
| Lightly damp microfiber | 2 | 1–2 | 1 | Towel transfer | Primary wet-cleaning approach on compatible material. |
| Localized cleaner + blotting | 2 | 2 | 1 | Towel transfer | Useful for compatible localized contamination after testing. |
| Steam treatment | 2–3 | 1–2 | 4–5 | Limited unless followed by towel recovery | Special-case tool requiring strict control; not a default method. |
| Spray extraction | 4–5 | 3–4 | 1–3 | High | Generally avoided as routine headliner cleaning; better suited to compatible upholstery and carpet. |
Why is aggressive extraction different from spot cleaning?
An extractor normally performs two jobs: it introduces liquid and then uses suction to recover liquid and suspended soil. On compatible cloth seats and carpets, this can be extremely useful.
The presence of vacuum recovery, however, does not eliminate the liquid-delivery stage. An extraction pass can expose the material to more solution and mechanical contact than a damp towel or localized treatment.
For a bonded headliner, that additional exposure is often unnecessary. Manufacturer guidance supports a lower-moisture approach: Ford specifically warns against oversaturation, while Volvo describes careful brushing and wiping for headliners even where extraction equipment is recommended for other textile upholstery.[4][5]
See how hot-water extraction works in car detailing for the surfaces where extraction can provide useful soil and liquid recovery.
Does extraction automatically dissolve headliner adhesive?
No universal claim like that is technically defensible.
Automotive headliners use different substrates, foams, adhesives and manufacturing systems. Engineering literature documents multiple adhesive systems rather than one universal glue formulation.[1][6]
The more precise conclusion is this: excess liquid and aggressive mechanical treatment add unnecessary stress to a laminated assembly, and the risk becomes more important when its foam, fabric or bond is already aged or compromised.
That is why Nathan’s Detailing treats moisture control as a risk-management decision rather than claiming that a particular number of extraction passes will automatically cause adhesive failure.
Moisture and mechanical force create a cleaning-risk window
Two variables deserve separate attention: how much liquid enters the material and how much mechanical force is applied to the textile. Either can become excessive even when the other remains low.
How is a headliner stain spot-cleaned?
Spot cleaning begins with the stain, not the machine. Fingerprints, cosmetics, food contact, insect residue, drink splashes, smoke-related film, road dust and water intrusion represent different contamination mechanisms.
The detailer should therefore evaluate three variables before changing chemistry:
What is the likely soil?
Water-soluble residue, oily contamination, particulate soil and dye transfer do not respond identically.
How old is it?
Heat, oxidation and previous cleaning attempts can make old marks harder to remove than fresh surface contamination.
What is underneath it?
A brown roof mark may reflect a leak or historical water intrusion rather than a simple surface spill.
After a discreet compatibility test, a small amount of cleaner can be applied through a microfiber towel or other controlled applicator. Soil is loosened gently and transferred into a clean towel section instead of flooding the entire ceiling.
How much agitation should be used?
Agitation means controlled mechanical action—not automatically scrubbing.
Depending on the material, this can involve blotting, light wiping, gentle circular motion or careful use of a soft brush. The objective is to separate soil from the fiber surface while preserving the appearance and attachment of the textile.
Volvo specifically warns against scraping or rubbing stains and recommends gentle treatment of headlining materials.[5]
Repeated aggressive brushing can create visible problems even without adhesive failure, including fuzzing, pilling, nap distortion or localized color change.
Why does a clean towel matter?
Once contamination has been loosened, it needs somewhere to go. A dirty or saturated towel can redistribute the same soil over a wider area.
Controlled towel transfer provides a useful visual checkpoint: the detailer can inspect how much contamination is leaving the surface and whether color from the textile itself is beginning to transfer.
That makes the towel both a cleaning tool and a diagnostic tool.
Why can water rings appear after spot cleaning?
A stain can look larger after poorly controlled spot cleaning because dissolved contamination may move with moisture toward the perimeter of the treated area as it dries.
Ford specifically addresses this problem in its interior-care instructions: if a ring develops after spot treatment, the surrounding surface may need to be cleaned more evenly while still avoiding oversaturation.[4]
This creates an important distinction: localized chemistry does not always mean an extremely sharp wet boundary. The detailer may need to feather or balance the treatment while keeping the total moisture load controlled.
Should steam be used on a car headliner?
Steam introduces a different process variable: thermal energy.
That does not make steam inherently good or bad. Its suitability depends on distance, exposure time, moisture output, textile construction and existing headliner condition.
Because a headliner can contain heat-sensitive foam, adhesives and laminated materials, steam should not be treated as the default answer to a difficult stain.
Read how steam cleaning is used during mobile detailing for a broader explanation of where controlled steam can be appropriate.
Should a headliner ever be soaked to remove a difficult stain?
No difficult stain automatically justifies saturation.
The remaining discoloration may no longer be removable soil. It could represent dye change, old water damage, bleaching, fiber damage or a previous chemical reaction.
Continuing to increase liquid and chemistry after the material has stopped responding can raise cleaning risk without increasing soil removal.
Headliner condition changes what result is realistically achievable
| Observed condition | Likely interpretation | Cleaning implication |
|---|---|---|
| Loose dust | Surface particulate contamination | Begin with dry removal; wet chemistry may not be necessary. |
| Fresh localized mark | Potentially removable surface contamination | Test and use controlled spot treatment. |
| Large brown water mark | Possible historic or active water intrusion | Consider source diagnosis before repeated cosmetic treatment. |
| Fabric sagging across a large area | Possible foam or bond deterioration | Cleaning cannot restore the original laminate structure. |
| Loose edge near trim | Existing separation | Minimize suction, pulling and liquid exposure. |
| Bleached or permanently lightened area | Possible dye or chemical damage | More cleaning chemistry will not necessarily restore color. |
| Fuzzy or abraded textile | Physical fiber damage | Reduce agitation; cleaning cannot reverse removed or damaged fibers. |
What is the difference between cleaning, stain removal and headliner repair?
| Service objective | What it addresses | What it does not automatically fix |
|---|---|---|
| Headliner cleaning | Loose soil, compatible surface contamination and some stains | Failed foam, detached fabric or structural damage |
| Stain treatment | A specific contaminant or discoloration source when chemically removable | Permanent bleaching or dye loss |
| Leak repair | Water entry through roof, glass, sunroof drainage or body sealing | Existing cosmetic staining automatically |
| Headliner repair | Loose fabric, degraded foam or separation | General interior soil |
| Headliner replacement | Severely deteriorated or irreparable assembly | Ordinary cleaning needs elsewhere in the cabin |
Keeping these entities separate prevents a common service expectation problem: a customer may ask for “headliner cleaning” when the visible issue is actually a leak or failed bonded material.
How does headliner cleaning compare with cloth-seat cleaning?
| Cleaning variable | Headliner | Compatible cloth seat | Why the difference matters |
|---|---|---|---|
| Typical moisture strategy | Minimal and localized | Controlled moderate moisture may be acceptable | Seat textiles can offer greater liquid-recovery options. |
| Routine extraction | Generally avoided | May be appropriate | Headliners are thin bonded overhead assemblies. |
| Agitation | Very gentle | Can sometimes tolerate more mechanical work | Headliner textile and laminate should not be pulled or distorted. |
| Hidden construction concern | Foam, adhesive and molded substrate | Foam, seams, sensors, heating or ventilation components | Both require construction-aware cleaning, but the risks are different. |
| Main over-wetting concern | Rings, distortion and stress on bonded layers | Slow drying, wicking, foam saturation and component exposure | The same amount of liquid can create different consequences. |
For the seat-specific process, see how cloth car seats are cleaned during mobile detailing.
How should a finished headliner detail be evaluated?
A professional result is not measured by how much cleaner was used or how dark the recovery towel became. It should be evaluated against the condition of the material before treatment.
- Loose contamination was removed before wet work began.
- Existing sagging, water intrusion and damaged material were identified before cleaning.
- The cleaner was tested before broad application.
- The amount of liquid remained controlled.
- Agitation did not visibly fuzz, stretch or distort the textile.
- Soil was transferred away rather than redistributed.
- No new rings, discoloration or loose areas appeared.
- The treated area was allowed to dry appropriately.
- Permanent defects were documented rather than chased with increasingly aggressive treatment.
How does Nathan’s Detailing approach headliner cleaning during a mobile appointment?
The cleaning method is selected after seeing the actual vehicle. Material condition, stain history, previous cleaning attempts, existing sagging and the location of the contamination all affect the decision.
The working hierarchy is: inspect → remove dry soil → test → use the least aggressive compatible method → control moisture → transfer residue → dry → verify.
That hierarchy also fits the broader mobile detailing cleaning-method system used for the rest of the vehicle.
If you are comparing services, review what mobile car detailing includes and how a mobile detailing appointment works.
Need interior detailing at your Northeast Ohio location?
Nathan’s Detailing can evaluate headliner stains, surface contamination, old water marks and existing material condition as part of an appropriate interior service. When requesting an appointment, mention any known leaks, previous headliner repairs, existing sagging or products already used on the area.
Explore Mobile Car DetailingEvidence and technical references
[1] SAE International, Technical Paper 910781: Design and Application of Thermoplastic Adhesive Films for Headliner Composites. Documents adhesive bonding of polyurethane-foam-backed fabric to molded automotive headliner shells and discusses multiple adhesive systems.
[2] Applied Sciences, 2019: Experimental Verification of Use of Vacuum Insulating Material in Electric Vehicle Headliner to Reduce Thermal Load. The published conventional headliner example included a 4 mm soft polyurethane foam layer at 104 g/m² and 26 kg/m³. These dimensions describe the study specimen, not every vehicle.
[3] U.S. National Highway Traffic Safety Administration: FMVSS No. 302 interpretation identifying headlining among regulated interior components and applying the standard to relevant material within 13 mm of the occupant-compartment air space.
[4] Ford Owner’s Manual, 2026: Cleaning Seats and the Headliner. Recommends vacuuming loose dirt, cleaning with a soft damp cloth and mild solution, spot treating heavy stains and avoiding oversaturation.
[5] Volvo Support: Cleaning Fabrics and Textiles / Cleaning Fabric Upholstery and Headlining. Recommends careful cleaning, lightly dampened microfiber and gentle movement; separate guidance describes extraction for upholstery while prescribing soft brushing and wiping for the headliner.
[6] SAE International, Technical Paper 920501: Acoustical Evaluation of Automotive Headliner Composites with Various Adhesive Systems. Describes lamination of headliner composites and use of multiple adhesive materials.
Manufacturer instructions for the exact make, model, trim and headliner material take priority over generic detailing guidance.